Building Your Own Classic Game Console, A DIY RetroPi Project With Raspberry Pi
Setting-Up RetroPi And Transferring ROMs
First things first, point your browser to Sourceforge and download a utility called Win32 Disk Imager . You will need Win32 Disk Imager in order to properly format your SD card and prepare it for RetroPi. Also, hit the RetroPie website and download the requisite image that is built for your specific Raspberry Pi model. RetroPie is a complete operating system and will boot-up on its own when powering up the Raspberry Pi, assuming everything has been installed properly on the SD card. Make sure that you unzip the the contents of the RetroPie download to a folder before starting.
Then, in Win32 Disk Imager, click on the folder icon and navigate to the folder where you unzipped the RetroPie image for your device, ours was labeled “retropie-4.1-rpi2_rpi3.img”. Once you've got the SD card and RetroPie image selected, press the “Write” button and click to confirm.
When the image writing process completes, you are ready to insert the SD into your Raspberry Pi and boot into the RetroPie OS.
Obviously, you'll need to have the Raspberry Pi plugged into a display to see what's going on, so plug the HDMI cable to your television (or monitor) and attach the power supply, keyboard, and USB game pad to the Raspberry Pi. The first time RetroPie boots, it will take several minutes to complete the setup, but after that's done, subsequent boot ups will be much faster.
Once the RetroPie finishes loading, you will be prompted to configure your controls. There are some control options that you won't need to emulate something like the NES -- such as the analog axis. They can be skipped by holding down any of the buttons on your controller.

The Retrode device for downloading your owned game cartridge ROMs
Dumping ROMs from the Retrode is simple. Create a new folder on your PC where you'd like to store the ROMs. Then, insert your desired cartridge into the Retrode (or similar device) and connect the Retrode to your PC, then wait until everything is detected and recognized by the OS.
Once recognized, the Retrode show up like any other mass storage device. In Windows Explorer, browse to the Retrode and you will see two files, a config file for the Retrode and the actual ROM of the game. Simply drag the game ROM into the folder you've created for your ROMs.
You will need to prepare your thumb drive for use in the Raspberry Pi by performing the following tasks: First, format the thumb drive using the FAT32 file system via your PC, and then create a folder on it named “retropie”. Once that's done, plug the drive into the Raspberry Pi while it is powered on and booted into RetroPie. You will see that the activity LED on the Pi blinks while it and scans and initializes the thumb drive -- wait until the activity LED stops.
Once activity on the Pi has ceased, the thumb drive is prepped and ready for ROM files to be copied into the retropie folder. Plug the drive back into your PC and add drag your ROM files over. Once completed, simply connect the the drive back into the Pi. The game ROMs will then be visible from the respective virtual consoles that are configured in the RetroPie operating system and are ready to play.
The versatility of the RetroPie interface can keep you well-satisfied with years of old school gaming, across multiple classic game console and handheld platforms.
If you want to save the shopping hassle, you can find pre-configured Raspberry Pi 3 media kits, complete with a case, power supply, HDMI cable and even a microSD card and heat sinks for the processor, for under $60 on Amazon. As you can see from our setup above, you don't actually need all this to run reliably and our system handled just fine bare and in an open air setup, though of course it's more prone to static shock in this environment.
Happy New Year and enjoy your warm slice of RetroPi gaming goodness.

Preparing The SD Card, Mounting Retropie
Before launching Win32 Disk Imager, make sure that your SD card is plugged into your PC and is recognized by the OS. Then, launch Win32 Disk Imager and select the appropriate drive letter for your SD card in the drop down menu on the far right of the interface.Then, in Win32 Disk Imager, click on the folder icon and navigate to the folder where you unzipped the RetroPie image for your device, ours was labeled “retropie-4.1-rpi2_rpi3.img”. Once you've got the SD card and RetroPie image selected, press the “Write” button and click to confirm.
When the image writing process completes, you are ready to insert the SD into your Raspberry Pi and boot into the RetroPie OS.
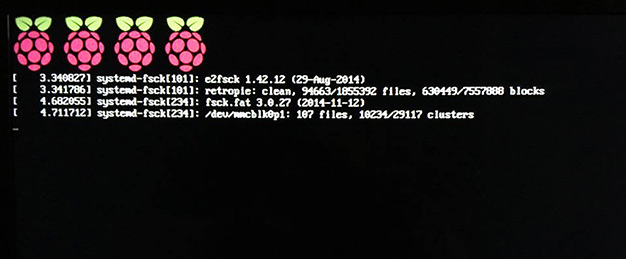
Obviously, you'll need to have the Raspberry Pi plugged into a display to see what's going on, so plug the HDMI cable to your television (or monitor) and attach the power supply, keyboard, and USB game pad to the Raspberry Pi. The first time RetroPie boots, it will take several minutes to complete the setup, but after that's done, subsequent boot ups will be much faster.
Once the RetroPie finishes loading, you will be prompted to configure your controls. There are some control options that you won't need to emulate something like the NES -- such as the analog axis. They can be skipped by holding down any of the buttons on your controller.

Installing and Transferring ROMs
The next thing we need to cover is how to acquire ROMs for play. There are many different means to “dump” your ROMs from a game cartridge to your hard drive. We used a Retrode, a cartridge reader that a PC recognizes as an external media storage device. The Retrode gives users the ability to plug in a cartridge and and drag and drop data from it with ease.
The Retrode device for downloading your owned game cartridge ROMs
Dumping ROMs from the Retrode is simple. Create a new folder on your PC where you'd like to store the ROMs. Then, insert your desired cartridge into the Retrode (or similar device) and connect the Retrode to your PC, then wait until everything is detected and recognized by the OS.
Once recognized, the Retrode show up like any other mass storage device. In Windows Explorer, browse to the Retrode and you will see two files, a config file for the Retrode and the actual ROM of the game. Simply drag the game ROM into the folder you've created for your ROMs.
Transferring ROMs To Your Raspberry Pi
Now we need to get the ROMs onto the RetroPie. You have the option to add ROMs by using a local private network, adding them directly to the SD card, or transferring them over with a secondary storage device like a USB thumb drive. The method we are going to outline is by using a USB thumb drive, which a convenient external storage option for ROMs.You will need to prepare your thumb drive for use in the Raspberry Pi by performing the following tasks: First, format the thumb drive using the FAT32 file system via your PC, and then create a folder on it named “retropie”. Once that's done, plug the drive into the Raspberry Pi while it is powered on and booted into RetroPie. You will see that the activity LED on the Pi blinks while it and scans and initializes the thumb drive -- wait until the activity LED stops.

Once activity on the Pi has ceased, the thumb drive is prepped and ready for ROM files to be copied into the retropie folder. Plug the drive back into your PC and add drag your ROM files over. Once completed, simply connect the the drive back into the Pi. The game ROMs will then be visible from the respective virtual consoles that are configured in the RetroPie operating system and are ready to play.


The versatility of the RetroPie interface can keep you well-satisfied with years of old school gaming, across multiple classic game console and handheld platforms.

If you want to save the shopping hassle, you can find pre-configured Raspberry Pi 3 media kits, complete with a case, power supply, HDMI cable and even a microSD card and heat sinks for the processor, for under $60 on Amazon. As you can see from our setup above, you don't actually need all this to run reliably and our system handled just fine bare and in an open air setup, though of course it's more prone to static shock in this environment.
Happy New Year and enjoy your warm slice of RetroPi gaming goodness.


